How to Buy Hosting from Hostinger: A Complete Beginner’s Guide
Launching a website has never been easier, yet many first-time website owners still hesitate at one critical step: purchasing hosting. The process appears simple on the surface—pick a plan, enter payment details, and you're done. In reality, the choices you make during checkout can influence your website's speed, security, scalability, and even its long-term operating costs.
Hostinger has become one of the most recognized names in affordable web hosting, attracting bloggers, startups, freelancers, online stores, and developers alike. Its popularity isn't built on low pricing alone. The platform combines an approachable dashboard, competitive performance, and a broad range of hosting options that appeal to beginners without leaving experienced users feeling constrained.
If you're wondering how to buy hosting from Hostinger, this guide walks through the entire process while explaining why each decision matters—not just what to click.
Why So Many Beginners Choose Hostinger
Choosing a hosting provider isn't simply about finding the cheapest option. Reliability, support, server performance, and ease of management all play a role in determining whether building your website becomes an enjoyable experience or an ongoing technical struggle.
Hostinger has positioned itself between budget hosting providers and premium managed platforms. Instead of overwhelming newcomers with complicated server terminology, it simplifies common hosting tasks through its custom hPanel interface while still offering features that appeal to developers.
Some of the reasons users gravitate toward Hostinger include:
- Affordable introductory pricing
- Fast SSD and NVMe storage on many plans
- Free SSL certificates
- One-click WordPress installation
- Global data center options
- Daily or weekly backups on selected plans
- Free email accounts (depending on the plan)
- AI-assisted website building tools
- 24/7 customer support
For someone creating their first website, these features remove many of the technical barriers traditionally associated with web hosting.
Buy Hostinger Hosting at 20% Discount Now
Before You Buy: Know What Your Website Actually Needs
One of the most common mistakes beginners make is purchasing hosting before clearly defining what they're building.
A personal portfolio has very different hosting requirements from an online store expecting thousands of visitors every day.
Before opening the Hostinger website, ask yourself a few simple questions:
- Will I build with WordPress?
- Am I starting a blog?
- Will I sell products online?
- Do I expect high traffic immediately?
- Will multiple websites share the same account?
- Do I need professional email addresses?
Your answers determine which hosting plan offers the best balance between cost and future growth.
Understanding Hostinger's Hosting Plans
Hostinger offers several hosting categories, each designed for different types of websites.
Shared Hosting
Shared hosting remains the most popular choice for beginners.
Multiple websites share server resources, keeping costs low while providing enough performance for most personal websites, blogs, portfolios, and small business sites.
Ideal for:
- First websites
- Bloggers
- Students
- Freelancers
- Small businesses
WordPress Hosting
Although technically built on shared infrastructure, WordPress Hosting includes optimizations specifically designed for WordPress websites.
Benefits often include:
- Better WordPress performance
- Automatic updates
- Optimized caching
- Easier WordPress management
- Improved security settings
If you already know you'll use WordPress, choosing WordPress Hosting can simplify future maintenance.
Cloud Hosting
Cloud Hosting provides dedicated resources within a cloud infrastructure.
It's suited for websites experiencing growing traffic or requiring better uptime and faster resource scaling.
Good for:
- Growing businesses
- Popular blogs
- Agencies
- Membership websites
- Medium-sized eCommerce stores
VPS Hosting
Virtual Private Server (VPS) hosting gives users significantly greater control over server configuration.
Unlike shared hosting, you're responsible for managing much of the server environment.
Suitable for:
- Developers
- Large applications
- Custom software
- Advanced users
- Businesses needing server-level customization
Unless you already understand Linux server administration, VPS hosting is generally unnecessary for a first website.
Step-by-Step: How to Buy Hosting from Hostinger
Step 1: Visit Hostinger's Official Website
Start by visiting Hostinger's homepage.
You'll immediately notice several hosting categories along with promotional pricing. Introductory discounts are common across the hosting industry, so it's worth comparing subscription durations before making a purchase.
Step 2: Select the Right Hosting Plan
Hostinger usually displays several plans side by side.
Rather than automatically choosing the cheapest option, compare what each includes.
Look carefully at:
- Storage capacity
- Number of websites allowed
- Monthly visitor recommendations
- Free domain eligibility
- Backup frequency
- Email hosting
- CDN availability
- Performance enhancements
For most beginners, the middle-tier plan often provides the best long-term value because it balances features with affordability.
Get Extra 20% OFF
Launch your website today with ultra-fast, secure & premium hosting from Hostinger. Click to claim your deal!
Step 3: Choose Your Subscription Length
Hostinger generally offers subscriptions ranging from monthly billing to multiple-year commitments.
Longer plans usually reduce the effective monthly price.
However, beginners should consider two factors:
- Total upfront cost
- Long-term commitment
A lower monthly rate can look attractive, but paying for several years in advance may not suit everyone's budget.
Step 4: Register or Connect a Domain Name
After selecting hosting, Hostinger asks whether you need a domain.
You'll usually have three choices:
Register a new domain
Ideal if you're launching a completely new website.
Examples:
- yourbusiness.com
- yourportfolio.com
- yourblog.in
Transfer an existing domain
If another registrar currently manages your domain, you may transfer it to simplify account management.
Use an existing domain
You can keep your current registrar while simply pointing the domain to Hostinger's servers using DNS settings.
Many experienced website owners actually prefer separating hosting and domain registration for greater flexibility.
Choosing the Right Domain Name
Your domain represents your online identity.
Strong domains are:
- Easy to remember
- Easy to pronounce
- Short
- Brandable
- Free from unnecessary numbers
- Relevant to your niche
Avoid overly long names filled with keywords. Modern branding tends to reward memorable names over keyword-heavy domains.
Domain Assignment and Propagation Dynamics
If the plan includes a free domain, the registration can be claimed directly from the setup wizard. However, when pointing an externally registered domain name (such as one from Namecheap, Cloudflare, or GoDaddy) to Hostinger, the domain's authoritative nameservers must be updated at the external registrar to the following addresses:
Nameserver 1: ns1.dns-parking.com
Nameserver 2: ns2.dns-parking.com
This nameserver update triggers global DNS propagation. While local systems may resolve the new target server in minutes, the update can take up to 24 hours to distribute fully across internet service providers. During this time, standard domain validation tests and secure socket handshakes may occasionally fail.
Step 5: Create Your Hostinger Account
Hostinger allows registration using:
- Email address
- Google account
- Facebook account
- GitHub account (availability may vary)
Use an email address you'll continue accessing for years, since billing notifications, security alerts, and account recovery depend on it.
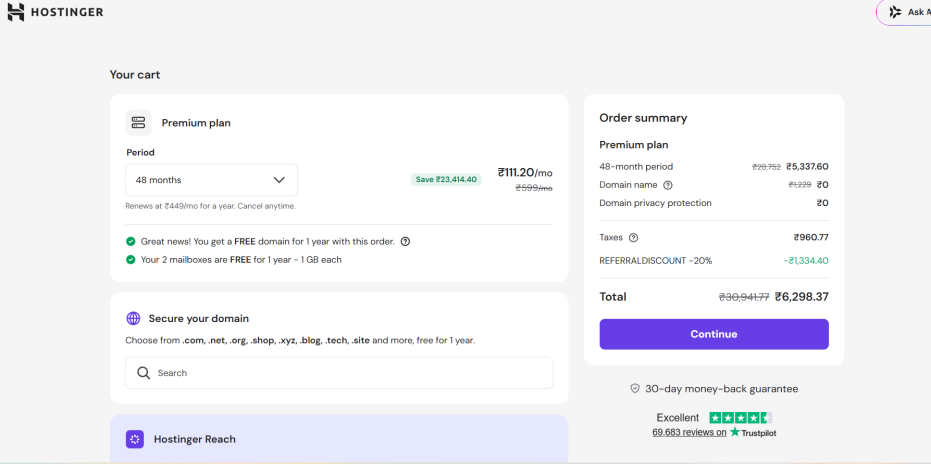
Step 6: Complete Payment
Hostinger supports multiple payment methods depending on your country.
These may include:
- Credit cards
- Debit cards
- PayPal
- Digital wallets
- Regional payment gateways
Before confirming payment, review optional add-ons carefully.
Some extras—such as enhanced security or premium support—may be useful for certain users, but they aren't essential for every new website. Understanding what you're paying for helps avoid unnecessary costs.
ALSO READ: How to launch a website on hostinger
What Happens After You Buy Hostinger Hosting?
Once your payment is confirmed, your Hostinger account becomes the central dashboard for managing your website. This is where you'll create websites, install applications, configure domains, manage email accounts, and monitor resource usage.
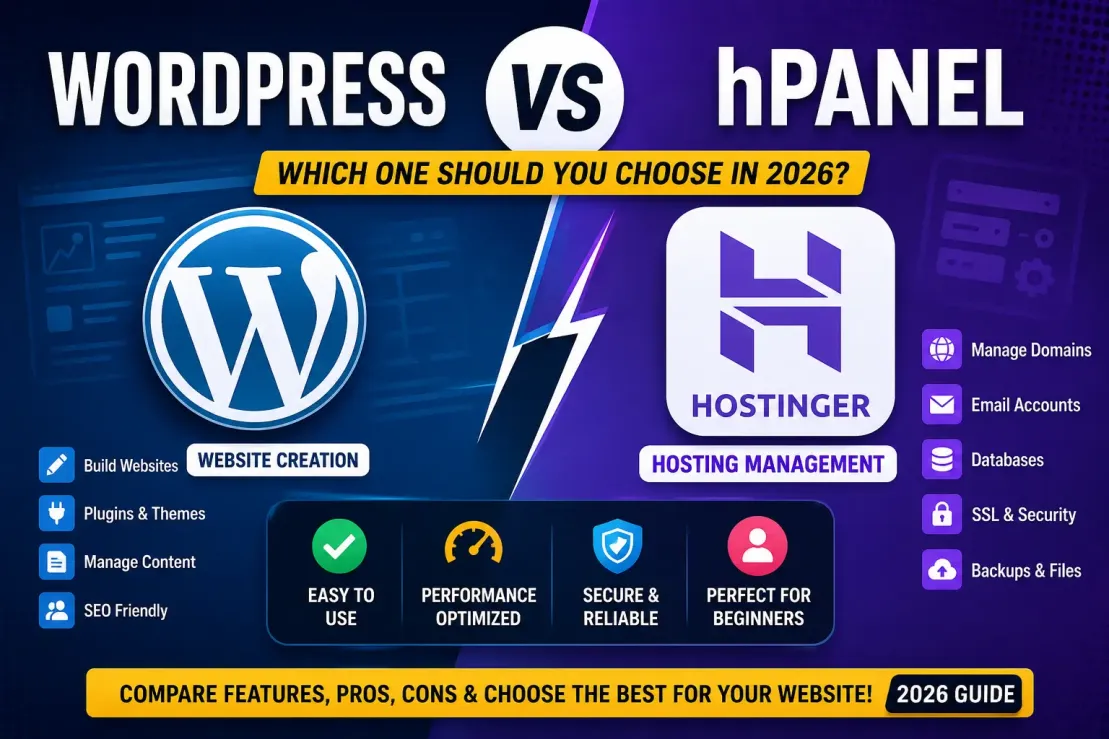
Unlike traditional hosting providers that rely on cPanel, Hostinger uses its own hPanel. The interface is designed to reduce complexity without sacrificing essential functionality. For beginners, this often means spending less time searching through menus and more time actually building a website.
Get Extra 20% OFF
Launch your website today with ultra-fast, secure & premium hosting from Hostinger. Click to claim your deal!
Your dashboard will typically display:
- Hosting plans
- Domain management
- Website management
- SSL certificates
- File Manager
- Database management
- Email accounts
- Backup options
- Security settings
- Billing information
Take a few minutes to familiarize yourself with the layout before making changes. Understanding where core tools are located will save time later.
Installing WordPress in Just a Few Minutes
For many users, purchasing hosting is only the first milestone. The next is installing a content management system, and WordPress remains the most popular choice.
Hostinger offers a one-click installation process that removes much of the manual configuration traditionally associated with setting up a website.
The basic workflow looks like this:
- Open Websites in hPanel.
- Click Add Website.
- Select WordPress.
- Enter your website name.
- Create an administrator username and password.
- Choose your preferred data center (if prompted).
- Begin the installation.
Within a few minutes, you'll have access to the WordPress dashboard, where you can install themes, add plugins, publish pages, and customize your site's appearance.
If you're unsure which theme to start with, choose a lightweight, well-maintained option rather than one packed with visual effects. A clean, fast-loading site is generally easier to maintain and performs better in search engines.
ALSO READ: Best Hosting for Blogger, Bussinesses and E-commerce
Connect Your Domain to the Website
If you registered your domain during checkout, Hostinger usually links it automatically to your hosting account.
If your domain is registered elsewhere, you'll need to update its DNS settings to point to Hostinger's nameservers or connect it using A records.
DNS changes aren't immediate. Depending on your registrar and internet provider, propagation can take anywhere from a few minutes to 48 hours, though many updates become visible much sooner.
During this period, avoid repeatedly changing DNS settings, as doing so may delay propagation.
Enable SSL Before Publishing
One of the first security tasks after connecting your domain is enabling an SSL certificate.
SSL encrypts communication between visitors and your website, replacing HTTP with HTTPS.
Modern browsers increasingly warn users when websites don't use HTTPS, and search engines treat secure connections as a standard expectation.
Hostinger includes free SSL certificates with many hosting plans. Activation typically requires only a few clicks inside hPanel.
Once enabled:
- Your website becomes more secure.
- Visitors gain confidence in your site.
- Login credentials are encrypted.
- Search engines recognize your website as using a secure connection.
Always verify that your website redirects visitors from http:// to https:// after SSL activation.
Create a Professional Business Email
Using a free email address like yourbusiness@gmail.com may work initially, but a domain-based email creates a more professional impression.
Instead of:
johnbusiness@gmail.com
Use:
info@yourbusiness.com
or
support@yourbusiness.com
Hostinger includes email hosting with selected plans, allowing you to create multiple email accounts for different purposes.
Common examples include:
- info@
- contact@
- sales@
- support@
- admin@
Professional email addresses improve credibility, particularly for freelancers, agencies, and small businesses.
ALSO READ: Shared hosting vs VPS vs Dedicated Hosting
Mail Server DNS Zone Configuration
Custom email routing requires specific DNS records to ensure message deliverability and protect the domain's sender reputation. If the domain’s nameservers point directly to Hostinger, hPanel can automatically generate these records under Emails -> Manage -> Domain Settings by selecting Connect Automatically.
If the domain’s DNS zone is managed by an external provider, the following records must be added manually within the external provider's control panel to route mail through Hostinger's mail system:
-
MX Records (Mail Exchange): Add two MX records pointing to
mx1.hostinger.com(Priority: Default) andmx2.hostinger.com(Priority: Default) to handle incoming mail routing. -
SPF (Sender Policy Framework): Add a TXT record with the value
v=spf1 include:_spf.mailhostbox.com ~allto authorize Hostinger's mail servers to send messages on behalf of the domain. -
DKIM (DomainKeys Identified Mail): This TXT record adds a cryptographic signature to outgoing mail headers, proving the message has not been altered in transit.
-
DMARC Policy: Add a TXT record named
_dmarc.yourdomain.comwith a standard monitoring policy (e.g.,v=DMARC1; p=none;) to guide receiving servers on how to handle messages that fail SPF or DKIM checks
Optimize Your Website from Day One
Many new website owners focus on design first and performance later. That often leads to slower pages and a frustrating visitor experience.
A few simple practices can make a noticeable difference:
Use Lightweight Themes
A visually impressive theme isn't always a fast one. Choose a theme that prioritizes clean code and regular updates.
Compress Images
Large image files are one of the biggest causes of slow websites. Compress images before uploading them and use modern formats such as WebP where possible.
Install a Caching Plugin
If you're using WordPress, caching reduces the amount of processing required for each page request, improving load times for returning visitors.
Remove Unnecessary Plugins
Every additional plugin introduces maintenance requirements and may affect performance or security. Install only what you genuinely need.
Keep Software Updated
Regularly update WordPress, plugins, and themes to benefit from security patches, compatibility improvements, and performance enhancements.
The Horizons Vibe Coding Environment: Prompt-Based App Creation
For developers and entrepreneurs looking to build custom web applications without writing code from scratch, Hostinger offers Hostinger Horizons. This platform uses an interactive, chat-based workflow that builds web applications and software-as-a-service (SaaS) prototypes from natural language prompts.
Unlike standard drag-and-drop website builders that output basic HTML templates, Horizons autogenerates a complete technical stack, typically utilizing a Node.js-based environment. The platform includes a prompt-based editor, built-in error detection, and an integrated database structure with up to 5GB of storage.
However, the automated nature of Horizons introduces specific architectural limitations:
-
No Traditional Access Protocols: Horizons does not support standard file transfer protocols like FTP, SFTP, or SSH.
-
Restricted Codebase Access: System configurations and internal server files are not accessible via the built-in code editor.
-
File Creation Boundaries: Administrators cannot create, upload, or delete entire system code files manually through the user interface.
For projects that require larger file systems or direct server access, developers can use a hybrid approach. By setting up a separate, empty HTML/PHP website on a standard Hostinger hosting plan, files can be uploaded via a traditional File Manager or SFTP and referenced within the Horizons application via public URLs. Alternatively, external cloud storage solutions like Amazon S3, Cloudinary, or Supabase can be integrated into a Horizons project using prompt-based configurations.
Security Practices Every New Website Owner Should Follow
Buying hosting is only the beginning. Keeping your website secure requires a few ongoing habits.
- Use a strong administrator password.
- Enable two-factor authentication where available.
- Update WordPress regularly.
- Delete unused plugins and themes.
- Schedule automatic backups.
- Limit administrator accounts.
- Monitor login activity.
- Use reputable plugins from trusted developers.
Security isn't about eliminating every risk—it's about reducing opportunities for attackers and recovering quickly if something goes wrong.
Which Hostinger Plan Should You Choose?
| Hosting Plan | Best For | Advantages | Considerations |
|---|---|---|---|
| Premium Shared Hosting | Blogs, portfolios, and personal websites | Affordable, beginner-friendly, free SSL certificate, WordPress support | Uses shared server resources |
| Business Hosting | Growing websites and small businesses | Better performance, daily backups, higher resource limits | Costs more than entry-level shared hosting |
| Cloud Hosting | High-traffic websites and online stores | Dedicated resources, improved scalability, enhanced reliability | May be unnecessary for new or small websites |
| VPS Hosting | Developers and custom applications | Full server control, dedicated resources, high flexibility | Requires technical knowledge to manage the server |
Common Mistakes Beginners Make When Buying Hosting
Many first-time buyers repeat the same avoidable mistakes.
Choosing Only by Price
The cheapest hosting plan isn't always the most economical in the long run. Consider features, support, storage, and scalability alongside cost.
Ignoring Renewal Pricing
Introductory discounts can differ significantly from renewal rates. Review the long-term pricing before committing to a multi-year plan.
Buying Features You Don't Need
Premium add-ons can be valuable for specific use cases, but not every new website requires advanced security packages or additional services on day one.
Forgetting Backups
Backups are your safety net. Confirm how often your hosting plan includes them and consider maintaining an additional off-site backup for critical websites.
Skipping Performance Considerations
A visually attractive website won't retain visitors if pages load slowly. Speed influences user experience, engagement, and search visibility.
Pros and Cons of Buying Hosting from Hostinger
Pros
- Competitive introductory pricing
- Beginner-friendly dashboard
- One-click WordPress installation
- Free SSL certificates
- Global server locations
- Good performance for most websites
- Responsive customer support
- Wide range of hosting options
- Scalable as your website grows
Cons
- Renewal pricing is higher than introductory offers
- Entry-level shared hosting has resource limitations
- VPS hosting requires technical knowledge
- Some advanced features are reserved for higher-tier plans
Trusted Industry Resources
When learning more about web hosting, website security, and WordPress, it's worth referring to trusted organizations and official documentation, including:
- Hostinger Knowledge Base
- WordPress.org
- ICANN (Internet Corporation for Assigned Names and Numbers)
- Let's Encrypt
- Google Search Central
- Cloudflare Learning Center
These resources provide reliable guidance on hosting, domains, security, and website best practices.
Last Message for Hosting users
Buying web hosting isn't just a transaction—it's the foundation of your online presence. The hosting plan you choose today affects how quickly your website loads, how reliably it stays online, and how easily it can grow alongside your goals.
For many beginners, Hostinger strikes a practical balance between affordability and functionality. Its straightforward setup, WordPress-friendly tools, and scalable hosting options mean you can start with a simple website and expand over time without immediately moving to a different provider.
The most successful website owners don't spend weeks searching for the "perfect" hosting plan. They choose one that meets their current needs, build a fast and secure website, and focus on creating valuable content or services. If you approach hosting with that mindset, you'll be in a strong position to grow your website with confidence.




💬 Comments (0)
🔒 Please login to post a comment.
Login Now